Set up Server-side user authentication with Next.js and Clerk
For authentication, Clerk allows for simple and quick setup of user authentication that is fully compatible with Next.js SSR or server side rendering.

In the series of posts, we will look into setting up Next with various services.
For authentication, Clerk allows for simple and quick setup of user authentication that is fully compatible with Next.js SSR or server side rendering and the edge runtime.
To start the project, create a Next.js app with the command :
npx create-next-appNext add the clerk/nextjs package
npm install clerk/nextjsOn the clerk side, head to their website, create a new project and copy the secrets in your .env.local file.
NEXT_PUBLIC_CLERK_PUBLISHABLE_KEY=your_publishable_key
CLERK_SECRET_KEY=sk_test_••••••••••••••••••••••••••••••••••Next, we need to wrap our app with the clerk provider
import { ClerkProvider } from '@clerk/nextjs'

export const metadata = {
  title: 'Next.js 13 with Clerk',
}

export default function RootLayout({
  children,
}: {
  children: React.ReactNode
}) {
  return (
    <ClerkProvider>
      <html lang="en">
        <body>{children}</body>
      </html>
    </ClerkProvider>
  )
}
Finally, we need to protect our routes with the auth middleware from Clerk. All we need to do is to create a middleware.tsx and return the following function
import { authMiddleware } from "@clerk/nextjs";

export default authMiddleware({});

export const config = {
      matcher: ['/((?!.+\\.[\\w]+$|_next).*)', '/', '/(api|trpc)(.*)'],
};
This makes all the project routes protected and only accessible for authenticated users.
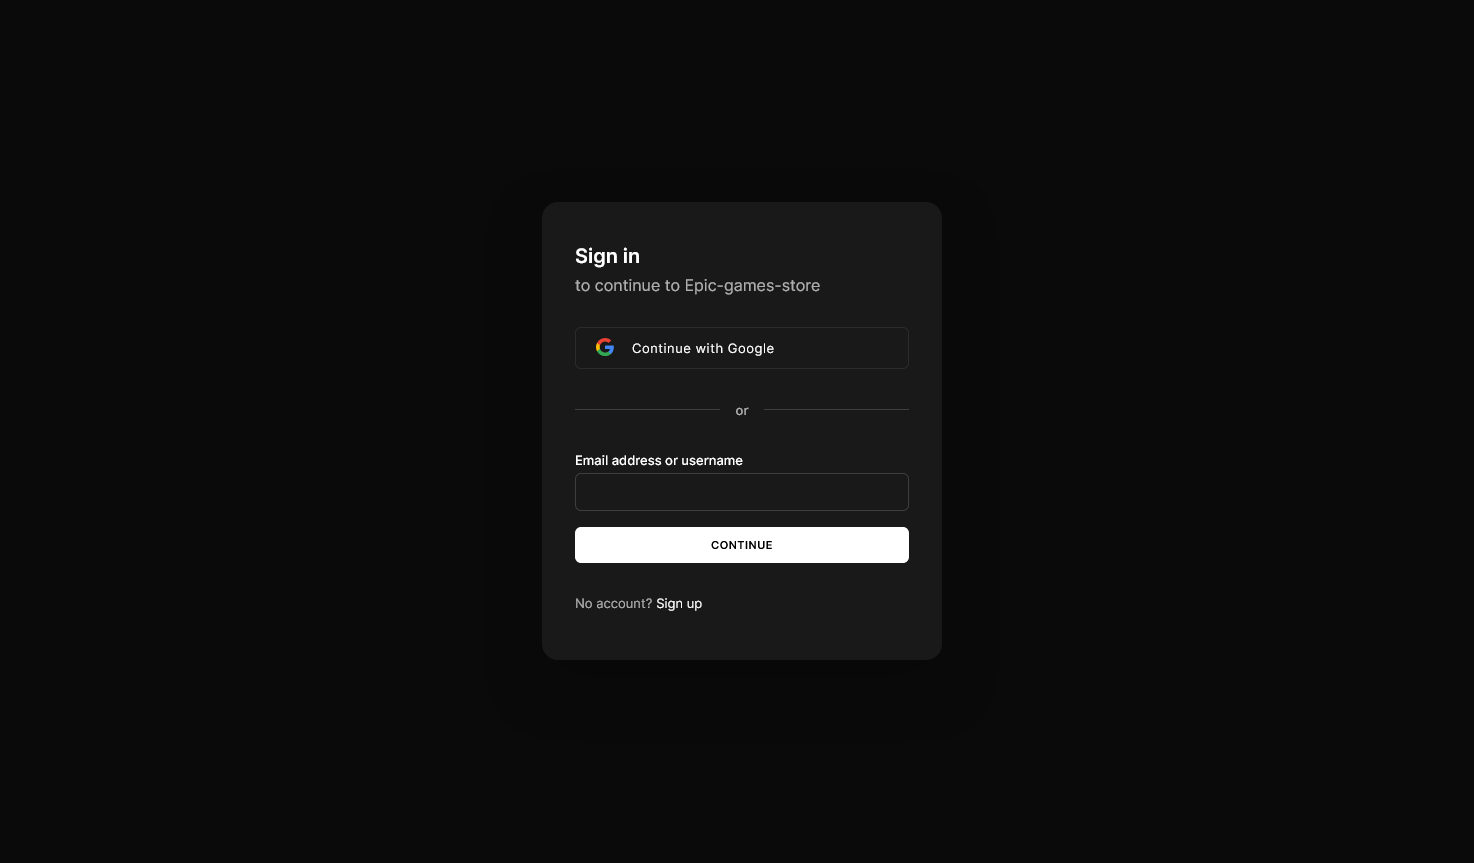
Clerk provides us with pre-build authentication pages, all you need to do is to create the routes
app/sign-up/[[...sign-up]]/page.tsx
import { SignUp } from "@clerk/nextjs";

export default function Page() {
  return <SignUp />;
}
app/sign-in/[[...sign-in]]/page.tsx
import { SignIn } from "@clerk/nextjs";

export default function Page() {
  return <SignIn />;
}
And there you have it 🚀, a simple user authentication flow with Next.js and Clerk.
See the full app code with a multipart tutorial here